
Mastering the Art of Face Makeup: A Step-by-Step Guide with Images
Related Articles: Mastering the Art of Face Makeup: A Step-by-Step Guide with Images
Introduction
With great pleasure, we will explore the intriguing topic related to Mastering the Art of Face Makeup: A Step-by-Step Guide with Images. Let’s weave interesting information and offer fresh perspectives to the readers.
Table of Content
Mastering the Art of Face Makeup: A Step-by-Step Guide with Images

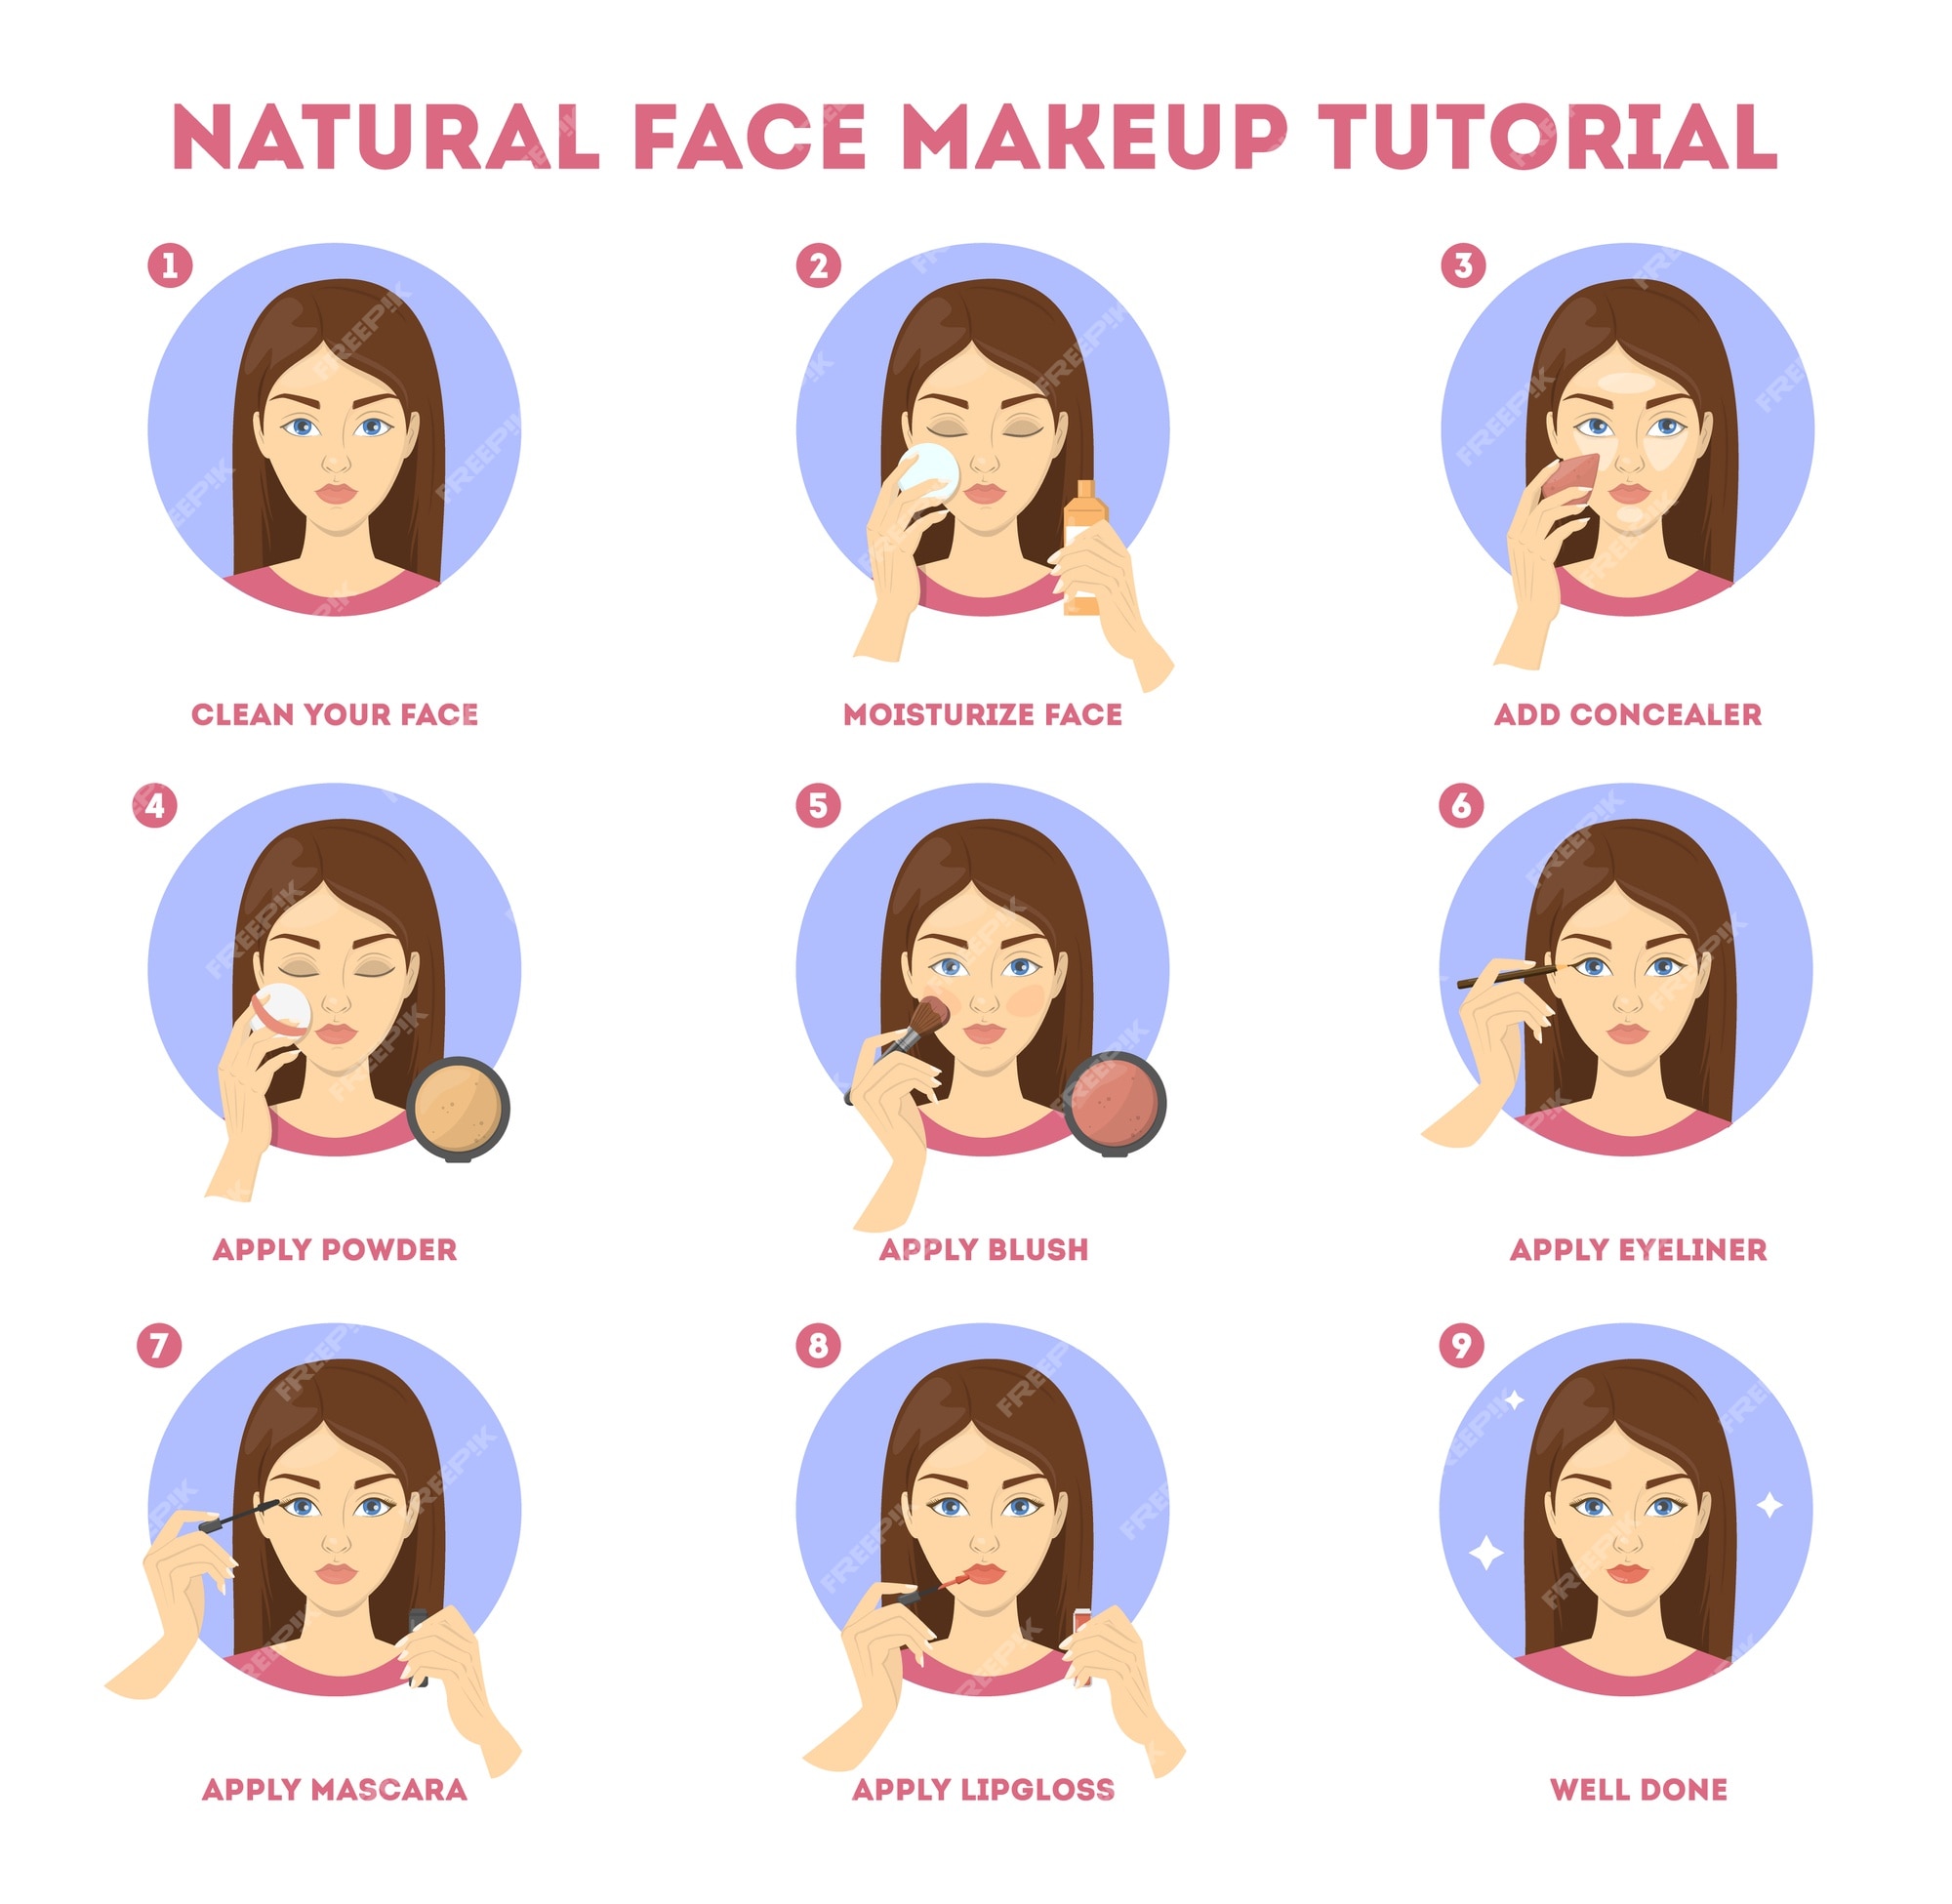
Face makeup, a powerful tool for enhancing natural beauty and expressing individual style, requires a thoughtful approach to achieve desired results. This comprehensive guide delves into the essential steps of face makeup, providing visual clarity through accompanying images, and offering insights into the techniques and products that contribute to a flawless and radiant look.
Step 1: Preparing the Canvas – Skin Care and Primer
Before embarking on the makeup application process, a well-prepared canvas is paramount. This involves a skincare routine tailored to individual skin type and concerns.
Image 1: Skincare Routine
- Cleansing: Start with a gentle cleanser to remove impurities and makeup residue.
- Toning: Follow with a toner to balance skin pH and prepare it for subsequent products.
- Moisturizing: Apply a moisturizer suited for your skin type to hydrate and nourish the skin.
- Eye Cream: Use an eye cream to address specific concerns like dark circles or puffiness.
Image 2: Primer Application
After skincare, apply a primer to create a smooth and even base for makeup. Primers help to minimize pores, blur imperfections, and enhance the longevity of makeup.
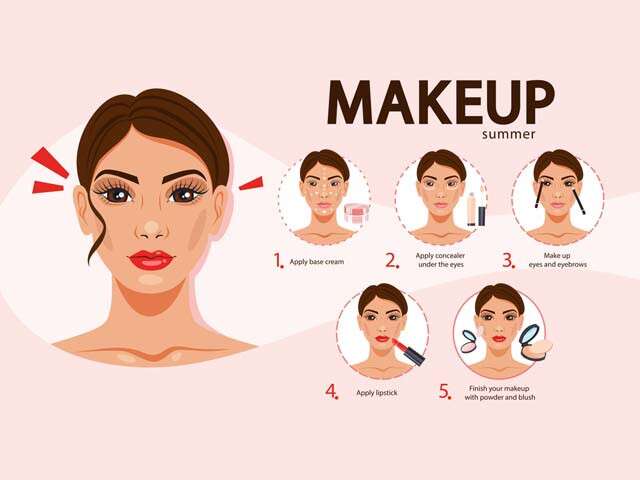
Step 2: Foundation – Achieving a Flawless Base
Foundation is the cornerstone of face makeup, unifying skin tone and creating an even canvas.
Image 3: Foundation Selection and Application
- Choosing the Right Foundation: Select a foundation shade that closely matches your skin tone, ensuring a seamless blend. Consider your skin type (oily, dry, combination) and desired coverage level (light, medium, full).
- Application Techniques: Use a foundation brush, sponge, or your fingertips to blend the foundation evenly across your face, paying attention to the hairline, jawline, and neck.
Step 3: Concealer – Addressing Imperfections
Concealer is a targeted solution for concealing blemishes, dark circles, and other imperfections.
Image 4: Concealer Application
- Choosing the Right Concealer: Select a concealer shade that is one to two shades lighter than your foundation for brightening and concealing.
- Application Techniques: Apply concealer directly to the areas you wish to conceal, using a small brush or your ring finger. Blend gently with a sponge or brush for a natural finish.
Step 4: Powder – Setting the Makeup
Powder sets makeup, preventing it from creasing or smudging, and provides a matte or semi-matte finish.
Image 5: Powder Application
- Choosing the Right Powder: Select a powder that complements your foundation and skin type. Loose powder offers a lighter coverage, while pressed powder provides a more buildable coverage.
- Application Techniques: Use a large powder brush to apply powder lightly over your face, focusing on areas prone to shine.
Step 5: Eyeshadow – Enhancing the Eyes
Eyeshadow adds depth, dimension, and color to the eyes, enhancing their natural beauty.
Image 6: Eyeshadow Application
- Choosing Eyeshadow Colors: Experiment with different eyeshadow palettes and colors to complement your eye color and desired look.
- Application Techniques: Use a blending brush to apply eyeshadow in a smooth and seamless manner. Start with a light shade on the entire eyelid, then apply a medium shade to the crease, and a darker shade to the outer corner for definition.
Step 6: Eyeliner – Defining the Eyes
Eyeliner defines the eyes, enhancing their shape and creating a dramatic or subtle effect.
Image 7: Eyeliner Application
- Choosing Eyeliner: Eyeliners come in various forms, including pencils, liquid liners, and gel liners. Choose the type that best suits your preference and skill level.
- Application Techniques: Apply eyeliner along the lash line, creating a thin line for a natural look or a thicker line for a bolder statement.
Step 7: Mascara – Adding Volume and Length to Lashes
Mascara adds volume and length to lashes, opening up the eyes and making them appear more defined.
Image 8: Mascara Application
- Choosing Mascara: Select a mascara that addresses your desired lash effect, whether it’s volume, length, or curl.
- Application Techniques: Apply mascara to the lashes from root to tip, wiggling the brush to separate and define each lash.
Step 8: Blush – Adding a Flush of Color
Blush adds a natural flush of color to the cheeks, creating a healthy and radiant glow.
Image 9: Blush Application
- Choosing Blush: Choose a blush shade that complements your skin tone and desired look. Cream blush provides a dewy finish, while powder blush offers a matte finish.
- Application Techniques: Apply blush to the apples of your cheeks, blending upwards towards the temples for a natural flush.
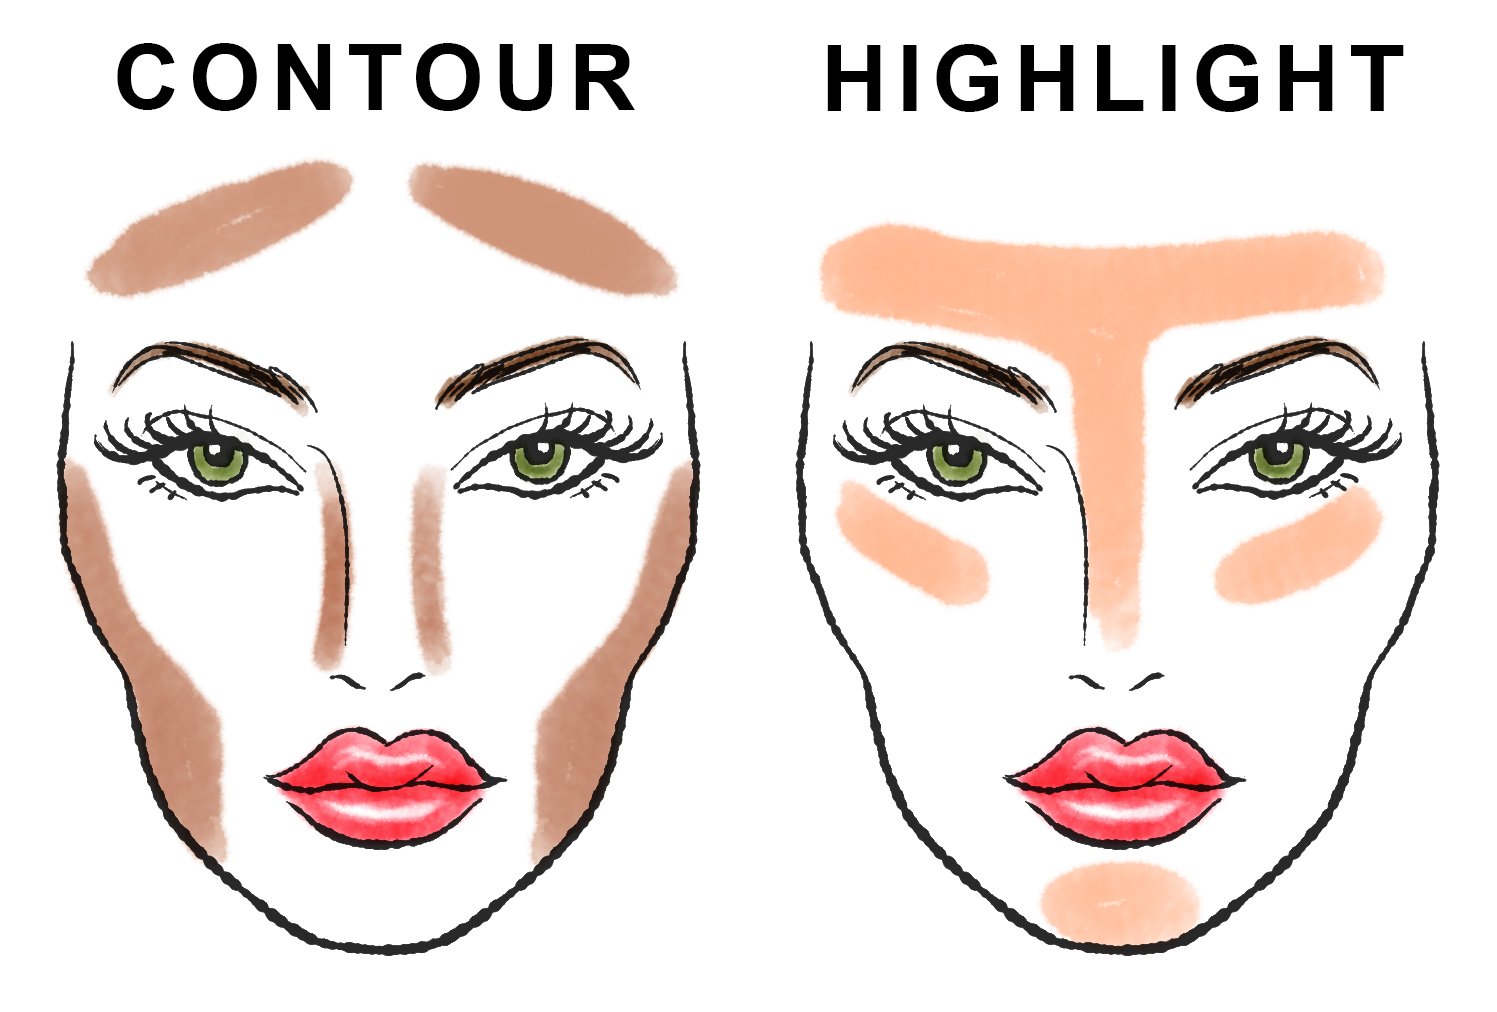
Step 9: Highlighter – Enhancing Facial Features
Highlighter emphasizes facial features, adding dimension and luminosity to the face.
Image 10: Highlighter Application
- Choosing Highlighter: Select a highlighter shade that complements your skin tone and desired level of shine.
- Application Techniques: Apply highlighter to the high points of your face, such as the cheekbones, brow bone, and cupid’s bow, to create a subtle glow.
Step 10: Setting Spray – Locking in the Makeup
Setting spray helps to lock in makeup, ensuring it lasts throughout the day and prevents fading or creasing.
Image 11: Setting Spray Application
- Choosing Setting Spray: Select a setting spray that suits your skin type and desired finish. Mattifying sprays are ideal for oily skin, while hydrating sprays are better for dry skin.
- Application Techniques: Hold the setting spray 6-8 inches away from your face and mist evenly over your entire face.
FAQs by Face Makeup Steps Images
Q: What are the best brushes for applying foundation?
A: Image 12: Foundation Brushes
- Flat Foundation Brush: This brush is ideal for applying liquid or cream foundation evenly and precisely.
- Buffing Brush: This brush helps to blend foundation seamlessly and create a flawless finish.
- Stippling Brush: This brush allows for a light and airy application, providing a natural-looking coverage.
Q: How do I choose the right shade of foundation?
A: Image 13: Foundation Shade Matching
- Test Foundation on Your Jawline: Apply a small amount of foundation to your jawline and blend it in. The shade that disappears seamlessly into your skin is the correct match.
- Consider Natural Lighting: Test foundation in natural lighting to ensure accurate shade matching.
Q: What are the different types of eyeliner?
A: Image 14: Eyeliner Types
- Pencil Eyeliner: Easy to apply and blend, offering a soft and natural look.
- Liquid Eyeliner: Provides a precise and bold line, ideal for creating dramatic looks.
- Gel Eyeliner: Offers a long-lasting and highly pigmented line, providing versatility in application.
Q: How do I apply mascara without smudging?
A: Image 15: Mascara Application Tips
- Wiggle the Wand: Wiggle the mascara wand from root to tip to separate and define lashes.
- Avoid Pumping the Wand: Pumping the wand introduces air into the mascara, causing it to dry out and become clumpy.
Tips by Face Makeup Steps Images
Tip 1: Clean Your Brushes Regularly
Image 16: Makeup Brush Cleaning
- Use a Gentle Brush Cleanser: Clean your makeup brushes regularly with a gentle brush cleanser to remove product buildup and prevent bacteria growth.
Tip 2: Practice Proper Storage
Image 17: Makeup Brush Storage
- Store Brushes Upright: Store your makeup brushes upright in a brush holder or container to prevent them from bending or becoming damaged.
Tip 3: Experiment with Different Makeup Looks
Image 18: Makeup Look Inspiration
- Explore Makeup Tutorials: Watch makeup tutorials and gather inspiration from different looks to expand your makeup skills and find your signature style.
Conclusion by Face Makeup Steps Images
Mastering the art of face makeup is an ongoing journey of experimentation and exploration. By understanding the essential steps, choosing the right products, and practicing application techniques, individuals can achieve a flawless and radiant look that enhances their natural beauty and reflects their unique style.
Image 19: Final Makeup Look
This comprehensive guide, accompanied by illustrative images, provides a foundation for building confidence and expertise in face makeup. As you continue to refine your skills and explore new techniques, remember that the key lies in embracing your individuality and celebrating the transformative power of makeup.


Closure
Thus, we hope this article has provided valuable insights into Mastering the Art of Face Makeup: A Step-by-Step Guide with Images. We thank you for taking the time to read this article. See you in our next article!